Installation Instructions
Follow these simple steps to install your Viraport clear window in any fabric cover.
What You'll Need
Tools Required
- Ink pen or permanent marker
- Scissors
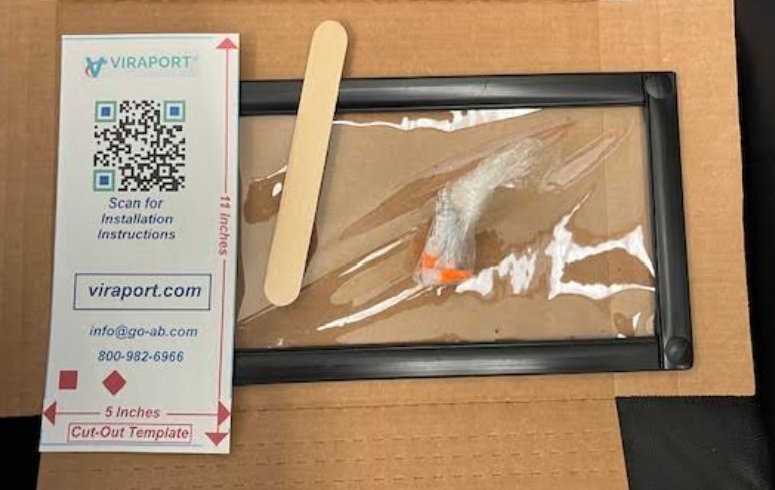
Included in Package
- Clear Inspection Port
- Wooden Craft Strip
- 2 Tubes of Super Glue
- Installation Template
Step-by-Step Installation
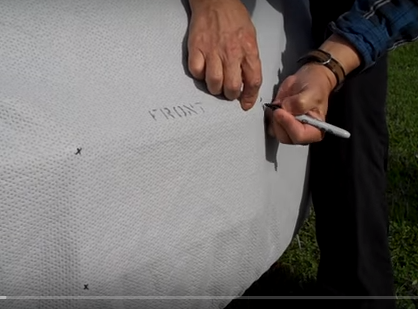
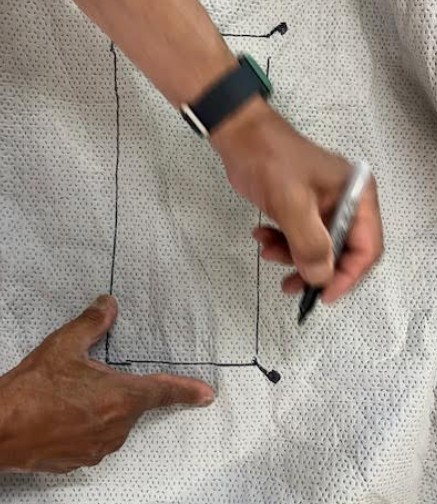
Step 1: Determine Placement
Select and clearly mark the desired location for installing the Clear Inspection Port on your fabric surface.
Step 2: Position Template
Center the included 5" x 11" paper template within your marked area.
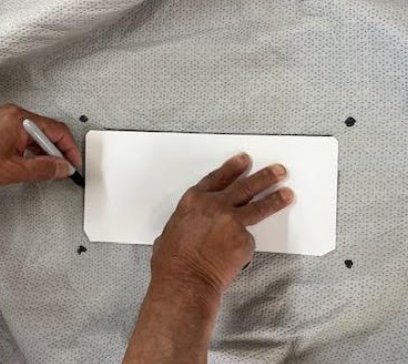
Step 3: Mark Cut Line
Use your pen or marker to trace a border around the template. This will serve as your cut line.
Step 4: Cut Opening
Carefully cut along the inside of the border line to remove the central fabric section.

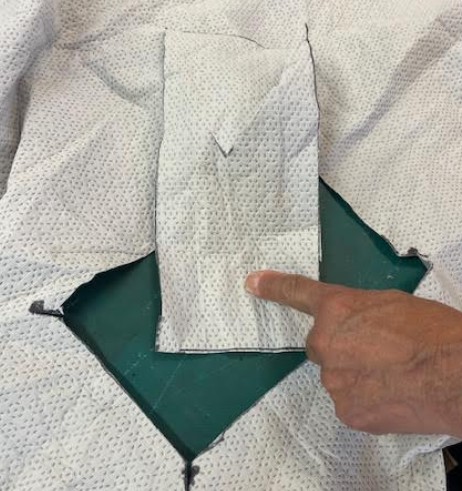
Step 5: Make Corner Cuts
Make an additional 1-inch diagonal cut into each of the four corners of the opening, as indicated on the template.
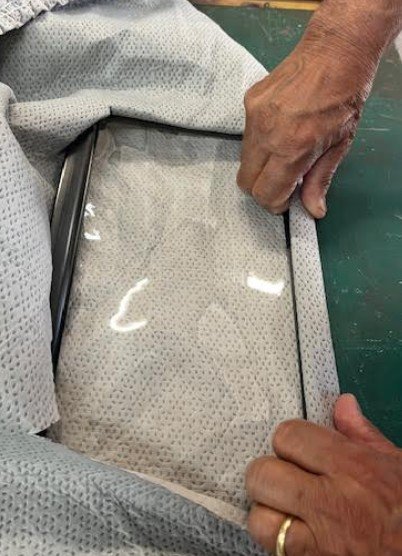
Step 6: Prepare the Port
Place the Clear Inspection Port on a flat, stable surface with either side facing up.
Step 7: Align Fabric
Position the fabric over the port so the opening is centered directly above the clear panel.
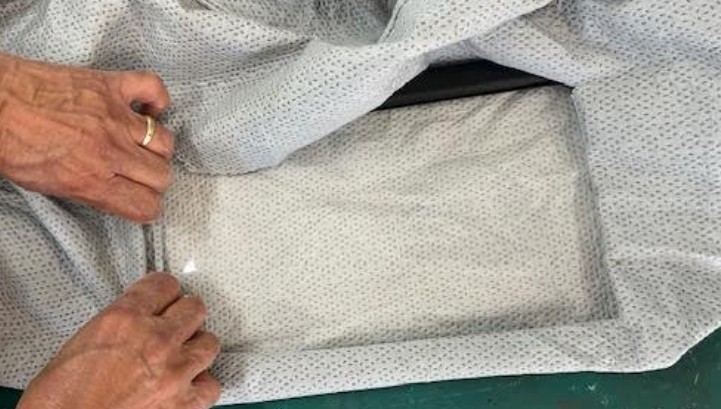
Step 8: Insert Fabric Tabs
Tuck the four fabric "tabs" created by the corner cuts into the black channel of the port frame.
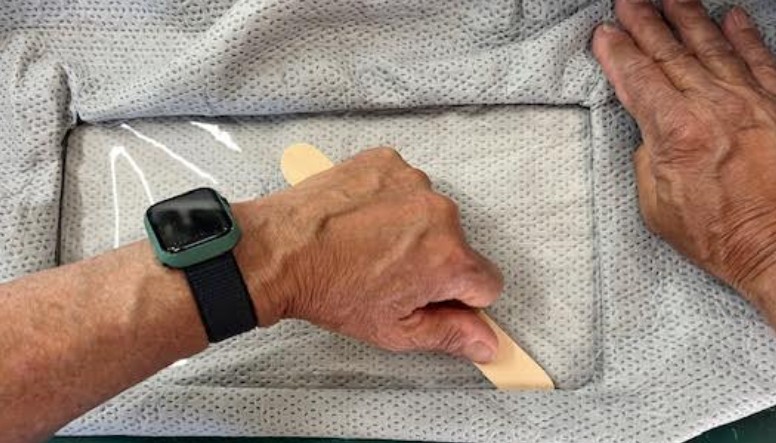
Use the provided Wooden Craft Strip to press each tab fully and evenly into the channel. Smooth out any wrinkles during this step for a clean and secure fit.
Step 9: Apply Adhesive
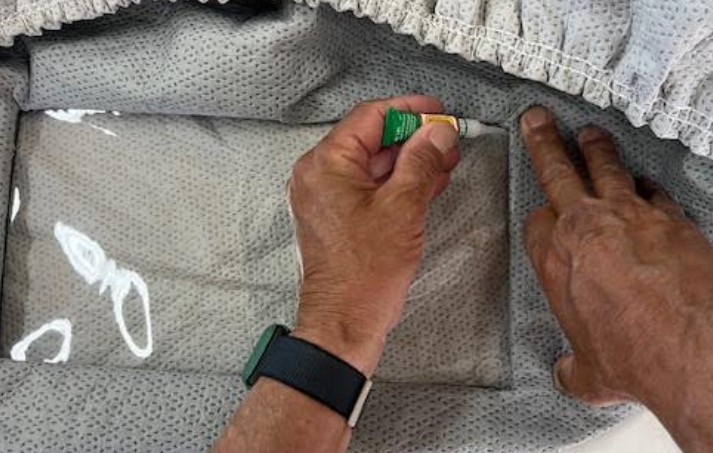
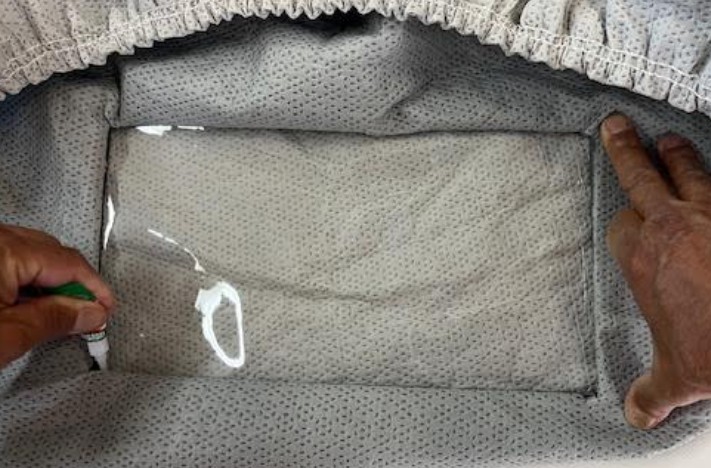
Once satisfied with the alignment and appearance, apply Super Glue along the inside edge of the frame to bond the fabric and port securely together. Allow the glue to dry for at least one hour before additional handling or use.
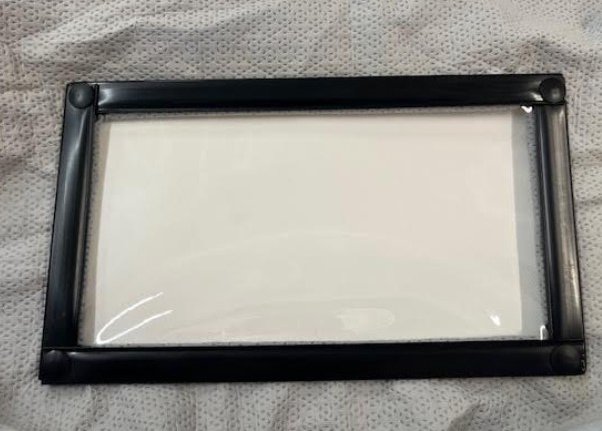
Installation Complete!
Nice job!
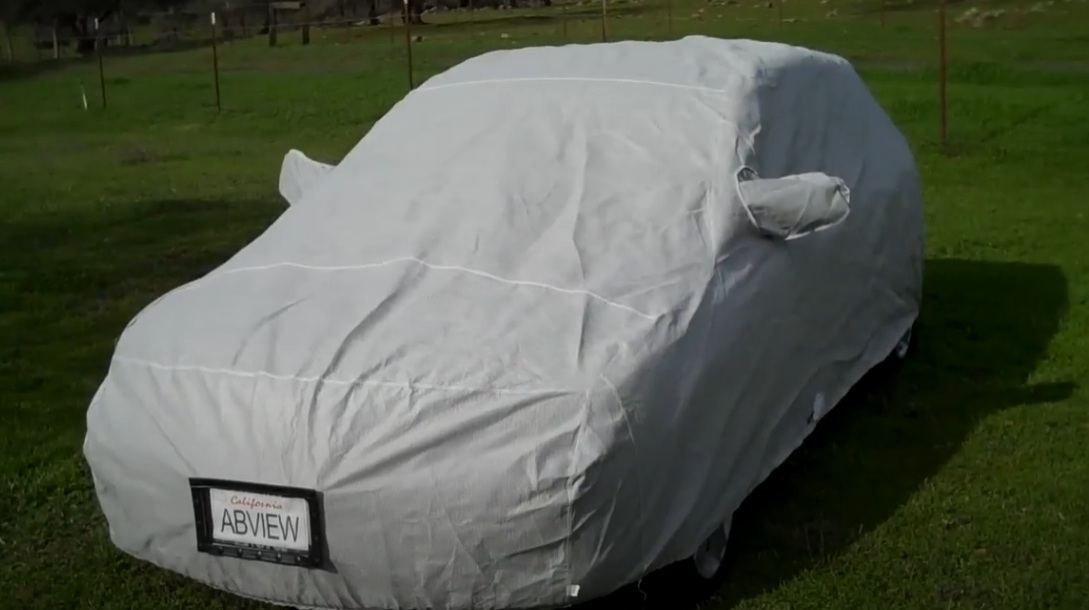
Place Cover on Car!
Installation Tips
- Work on a clean, flat surface for best results
- Take your time with measurements and cutting
- Test fit before applying adhesive
- Allow full cure time before use